

15 Dreamy Black and White Tile Bathroom Transformations
Look, I get it. You’re probably standing in your bathroom right now, staring at those beige tiles from 1987, wondering how you ended up here. I’ve been there—literally stood in my outdated bathroom thinking, “There’s gotta be a better way.”
That’s when I fell down the rabbit hole of black and white tile bathrooms, and honestly? I haven’t looked back since.
Black and white tile bathrooms aren’t just trendy—they’re timeless. They’re that perfect combination of elegance and versatility that somehow works whether you’re going for vintage vibes or ultra-modern minimalism.
Plus, let’s be real, they photograph like a dream for those Instagram shots. So grab your coffee (or wine, no judgment), and let me walk you through 15 transformations that’ll make you want to rip out your current bathroom immediately.
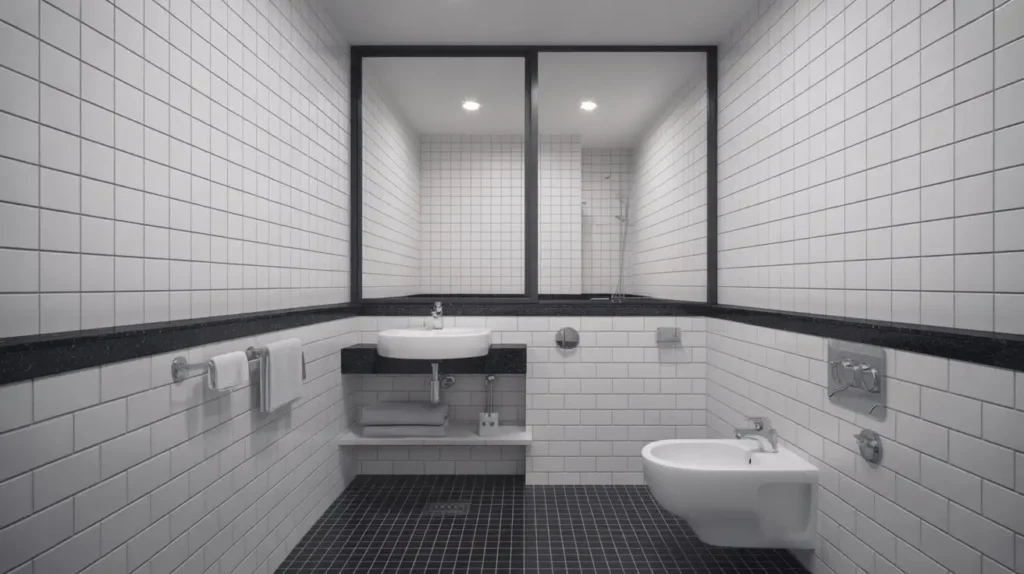
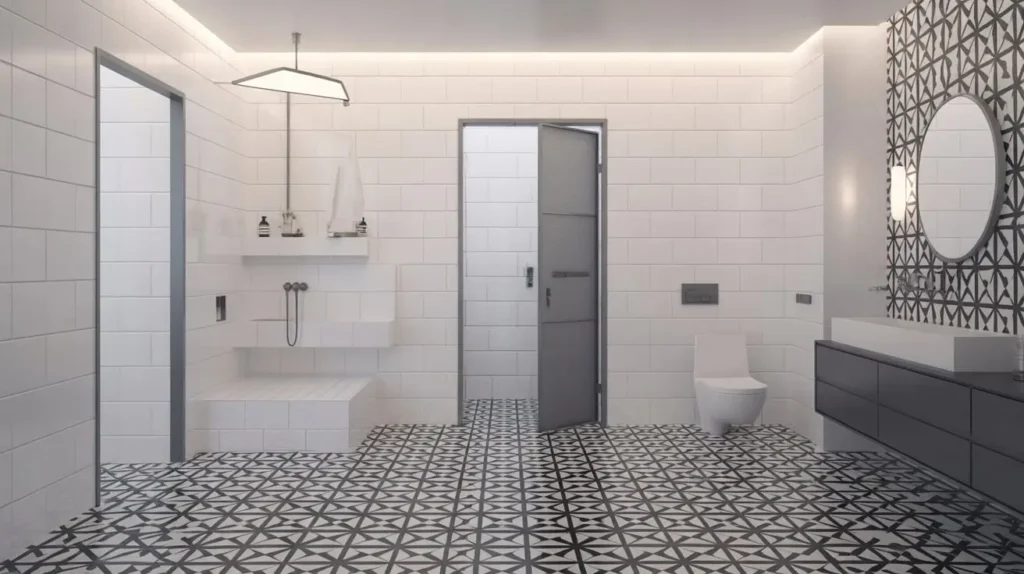
Modern Monochrome Bathroom Elegance
You know that sleek, sophisticated look that makes you feel like you’ve stepped into a luxury hotel? That’s modern monochrome for you. I recently helped my sister transform her master bathroom using large-format black and white tiles, and the difference was absolutely mind-blowing.
The key to nailing this look:
- Large format tiles (think 24×24 inches or bigger) in matte finishes
- Minimal grout lines to create a seamless appearance
- Chrome or brushed nickel fixtures for that contemporary edge
- Strategic lighting to highlight the contrast
Here’s what I love about this approach—it’s clean without being cold. You use white as your dominant color (usually 70-80% of the space) and introduce black as strategic accents. Maybe it’s a black accent wall in the shower, or a black vanity against white walls. The contrast creates visual interest without overwhelming the space.
One thing I learned the hard way? Don’t go glossy on everything. Mixing matte and gloss finishes adds depth and prevents that “showroom floor” vibe that can feel a bit sterile. Trust me on this one—I made that mistake in my first bathroom reno, and it looked like I could perform surgery in there. Not the vibe I was going for 🙂
Creating Balance
The trick with modern monochrome is balance. You don’t want your bathroom looking like a checkerboard exploded (unless you’re going for that specifically, but we’ll get to that later). Instead, you’re creating zones of color that guide the eye around the space.
I typically recommend using white for walls and ceiling to keep things bright, then introducing black through the floor, one accent wall, or bathroom fixtures. Your vanity becomes a statement piece here—a floating black vanity against crisp white walls? Chef’s kiss.
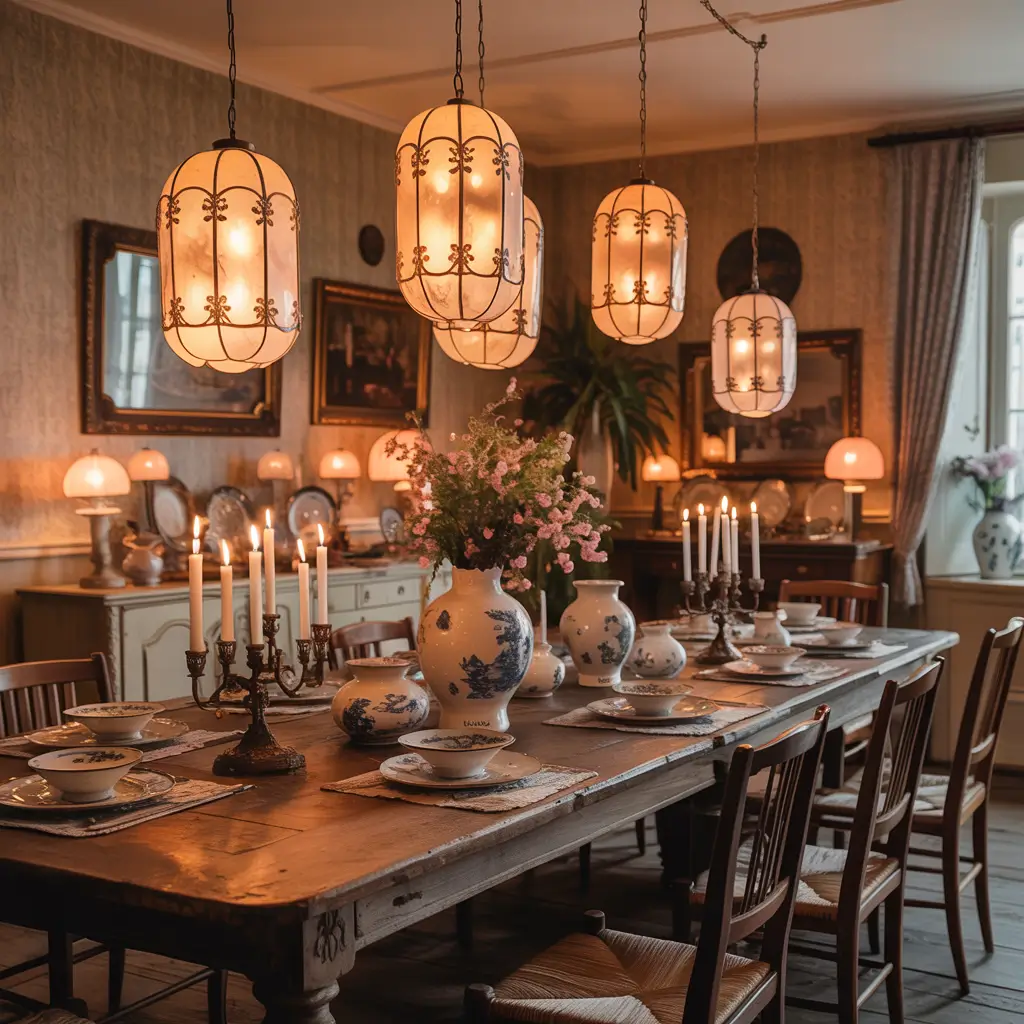
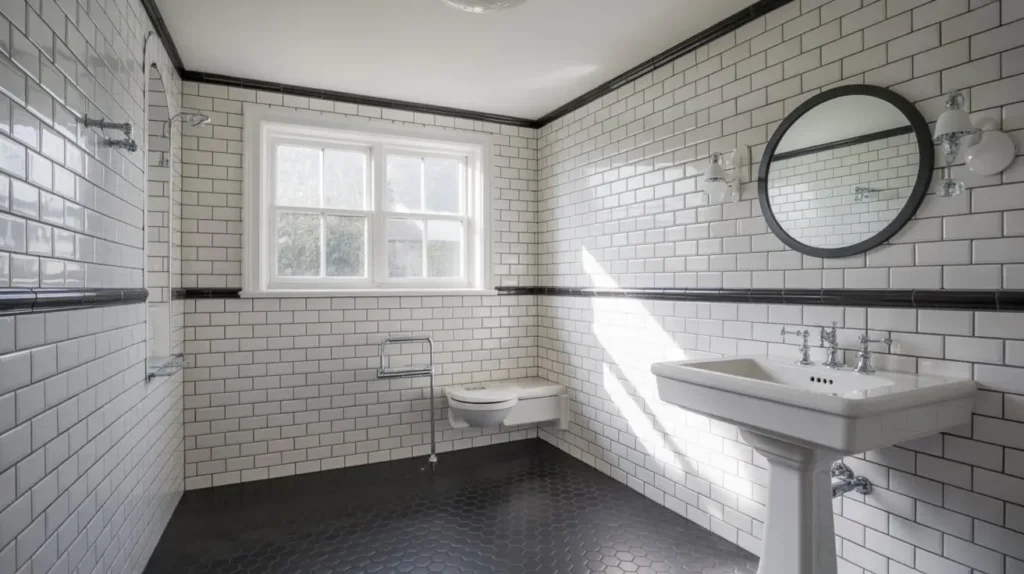
Vintage Black and White Tile Charm
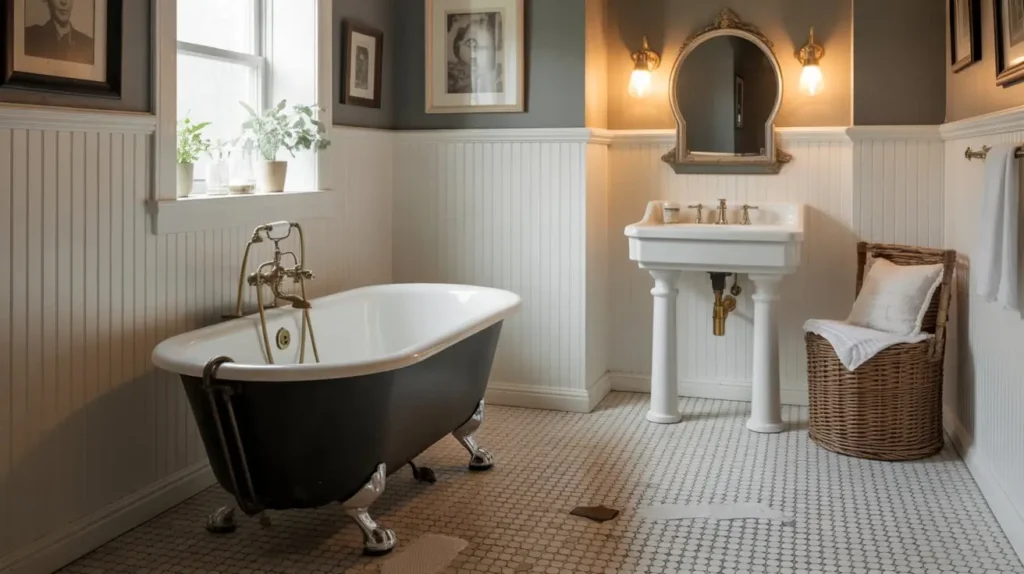
Ever walked into one of those old hotels with the tiny hexagonal floor tiles and thought, “Wow, they don’t make them like this anymore”? Well, good news—you absolutely can recreate that vintage charm in your own bathroom.
Vintage black and white bathrooms transport you straight back to the 1920s or 1930s, when craftsmanship actually meant something. I’m talking about those classic penny tiles, basket weave patterns, and octagon-and-dot combinations that your great-grandmother probably had in her bathroom.
Essential elements for vintage charm:
- Small-scale tiles (penny rounds, 1-inch hexagons, or small subway tiles)
- Decorative borders and trim work
- Pedestal sinks or console vanities
- Vintage-style fixtures in polished chrome or oil-rubbed bronze
- Wainscoting or beadboard painted white
What makes vintage black and white bathrooms so special is the attention to detail. You’re not just slapping tiles on the wall—you’re creating patterns, incorporating borders, and choosing fixtures that honor that era. I spent weeks hunting down the perfect cross-handle faucets for my guest bathroom renovation, and every guest who visits comments on them.
The beauty of this style? It’s forgiving. Small tiles actually hide imperfections better than large format tiles, which is fantastic if you’re working with an older home that has settling or uneven walls (speaking from experience here).
Checkerboard Floor Bathroom Style
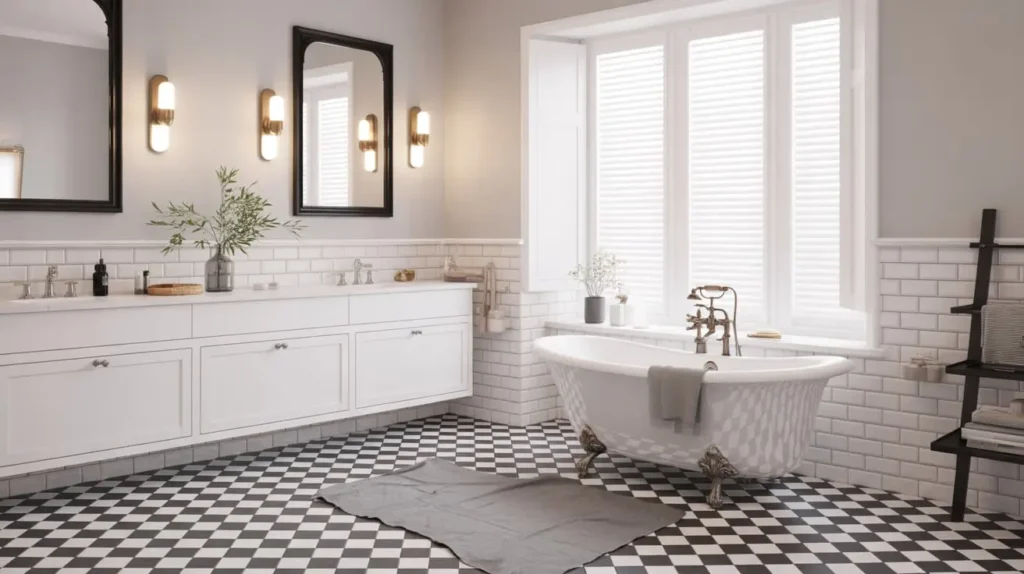
Okay, let’s talk about the elephant in the room—or should I say, the classic pattern that never goes out of style? Checkerboard floors are bold, playful, and surprisingly versatile. But here’s the thing: you gotta commit.
I’ve seen too many people try to do a half-hearted checkerboard, and it just doesn’t work. You need equal-sized tiles in pure black and pure white, laid in a perfect grid. No wishy-washy grays, no alternating patterns—just good old-fashioned checkerboard glory.
When I renovated my powder room, I went full checkerboard on the floor, and people either absolutely love it or think I’m slightly crazy. There’s no in-between, and honestly? I’m here for it. It makes a statement without requiring any other major design elements.
Making Checkerboard Work
The secret to successful checkerboard styling is keeping everything else relatively simple. If your floor is doing all the talking, your walls and fixtures should take a back seat. I went with plain white subway tile on the walls and a simple white pedestal sink, letting that checkerboard floor be the star.
Pro tips for checkerboard success:
- Stick to 12×12 inch tiles for a classic look (smaller feels too busy, larger can look disproportionate)
- Use contrasting grout—white grout with black tiles, black grout with white tiles
- Keep walls predominantly white to avoid visual overload
- Add a vintage-style mirror or a piece of black-framed art to tie it together
FYI, this pattern works especially well in smaller bathrooms because it creates visual interest and actually makes the space feel larger by drawing the eye across the entire floor.
Also Read: 15 Dreamy White Tile Bathroom Ideas for Small Spaces
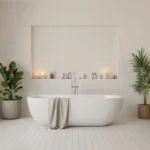
Minimalist Black and White Spa Retreat
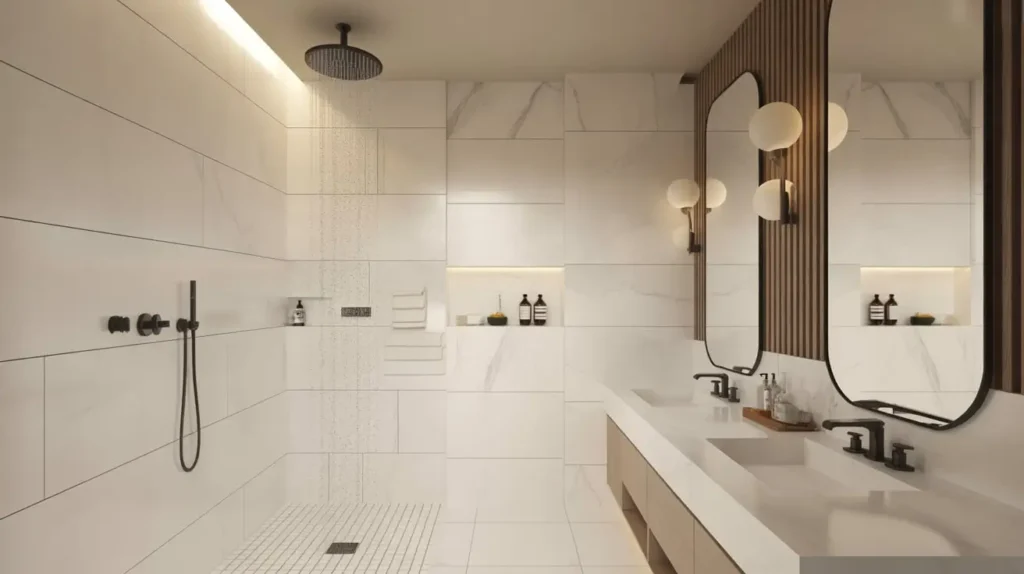
Who doesn’t want their bathroom to feel like a spa? I’m talking about that zen, peaceful vibe where you can actually relax in the tub without your phone buzzing every five seconds (okay, you’ll probably still bring your phone, but at least the ambiance will be there).
Minimalist black and white spa bathrooms embrace simplicity and natural materials. You’re combining sleek black and white tiles with wood accents, plenty of plants, and clean lines that promote a sense of calm.
I transformed my main bathroom into a spa retreat last year, and it’s become my favorite room in the house. The foundation is simple: large white tiles with black accent strips creating subtle horizontal lines that make the space feel wider. Add in a wooden stool, some eucalyptus in the shower, and suddenly you’ve got yourself a wellness retreat.
Key Elements for Spa Vibes
The minimalist spa look relies on quality over quantity. You’re not filling every surface with stuff—you’re being intentional about what you include.
- Tile choice: Large format white tiles (porcelain or ceramic) with thin black pencil tiles as accents
- Fixtures: Matte black or brushed gold for a modern spa feel
- Storage: Recessed niches or floating shelves (no clutter!)
- Lighting: Warm, dimmable LED lights
- Natural elements: Wood bath mats, bamboo accessories, live plants
What I love about this approach is how it makes you actually want to spend time in your bathroom. I’ve started taking actual baths again (something I literally never did before), and I’m pretty sure it’s because the space finally feels inviting instead of institutional.
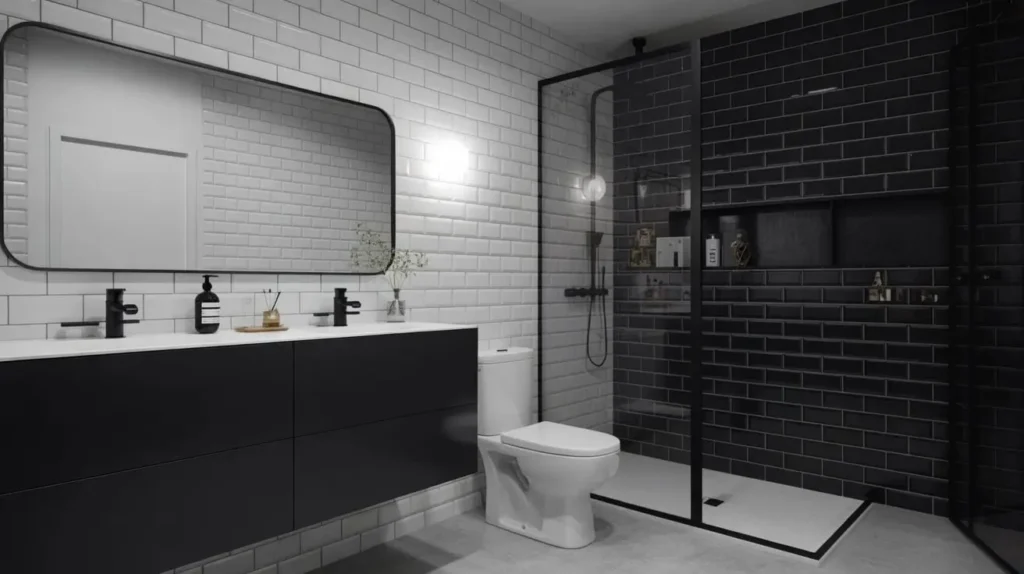
Bold Contrast Bathroom Makeover
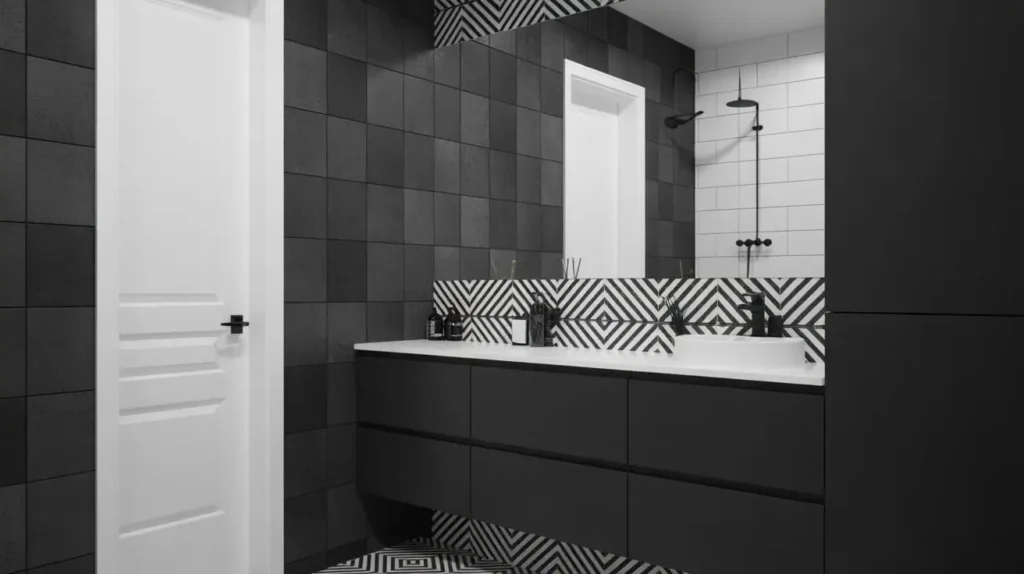
Some of you are playing it safe with 90% white and a touch of black. But what if I told you to flip the script entirely? Bold contrast bathrooms embrace dramatic black-and-white combinations that make a serious statement.
Think black walls with white fixtures, or a predominantly black bathroom with strategic white elements that pop. This isn’t for the faint of heart, but when done right, it’s absolutely stunning.
My brother went this route in his loft bathroom—matte black tiles on three walls, white subway tiles on the fourth, black floor, and a crisp white freestanding tub. The result? It looks like something out of an architectural magazine. People literally ask to use his bathroom just to see it (weird flex, but okay).
How to pull off bold contrast:
- Use matte black tiles to avoid the “cave” effect that glossy black creates
- Incorporate plenty of lighting—this is non-negotiable
- Choose one or two white statement pieces (tub, sink, or toilet)
- Add reflective surfaces like mirrors to bounce light around
- Consider texture—matte vs. gloss, smooth vs. textured tiles
The biggest concern people have with dark bathrooms is that they’ll feel small or dungeon-like. Here’s the truth: if you skimp on lighting, yes, you’ll create a cave. But if you invest in proper lighting—think recessed lights, wall sconces, and maybe a statement pendant—you create drama and depth instead of darkness.
Classic Subway Tile Black and White Look
Let’s get real for a second—subway tiles are the little black dress of bathroom design. They’ve been around forever, they’re versatile, they’re affordable, and they always look good. Sometimes the classics are classic for a reason, you know?
I’ve used subway tiles in three different bathroom renovations, and each time I’ve achieved a completely different look. That’s the magic of these rectangular beauties—they’re a blank canvas for your creativity.
Traditional White Subway with Black Accents
The most common approach is white subway tiles on the walls with black grout. This creates definition and visual interest without being overwhelming. I did this in my first apartment bathroom, and it instantly made the space feel more expensive and intentional.
Layout options that change everything:
- Horizontal brick pattern (classic and timeless)
- Vertical stacked pattern (makes ceilings feel higher)
- Herringbone pattern (adds visual interest and movement)
- Diagonal pattern (unexpected and eye-catching)
Then you’ve got the inverse option—black subway tiles with white grout. This is bolder and creates more contrast, perfect for an accent wall in your shower or behind the vanity. I’ve seen this work beautifully in small powder rooms where you want maximum impact.
Mixed Subway Tile Patterns
Want to get fancy? Mix black and white subway tiles in patterns. You could do alternating colors for a scattered look, or create geometric designs by arranging tiles in specific patterns. I saw someone create a gradient effect going from all black at the floor to all white at the ceiling, and it was genuinely impressive.
Art Deco Inspired Bathroom Design

Okay, if you want to feel like you’ve stepped into a 1920s speakeasy every time you brush your teeth, Art Deco is your jam. We’re talking geometric patterns, luxurious materials, and bold black and white contrasts that scream sophistication.
Art Deco bathrooms are all about glamour and geometry. Think stepped patterns, chevron designs, fan shapes, and lots of shiny surfaces. I helped design an Art Deco bathroom for a client’s historic home, and sourcing the materials was like a treasure hunt—in the best way possible.
Essential Art Deco elements:
- Geometric tile patterns (chevron, hexagon, or stepped designs)
- Black and white marble or marble-look tiles
- Gold or brass fixtures and hardware
- Glossy, reflective surfaces
- Symmetrical layouts
- Statement mirrors with geometric frames
The key to nailing Art Deco is precision. Your tiles need to line up perfectly because the geometric patterns are the star of the show. One crooked line and the whole effect falls apart. (Ask me how I know… let’s just say my first attempt was a learning experience.)
Creating Authentic Art Deco Style
You don’t need to go full Great Gatsby to achieve Art Deco vibes. Start with a feature wall using black and white tiles in a geometric pattern—maybe a chevron backsplash behind your vanity or a fan pattern in your shower niche. Add brass fixtures, a geometric mirror, and some period-appropriate lighting, and you’re 90% there.
IMO, the bathroom is actually the perfect place to experiment with Art Deco because it’s a smaller space where you can go bold without overwhelming your entire home.
Small Bathroom Black and White Illusion
Got a tiny bathroom? Yeah, me too (in my rental, anyway). The good news is that black and white tiles can actually make small bathrooms feel bigger if you use them strategically. The bad news is that doing it wrong can make your bathroom feel like a closet.
Small bathrooms require smart tile choices and clever layout tricks. You’re working with optical illusions here, using contrast and pattern to manipulate how our eyes perceive space.
Strategies that actually work:
- Use predominantly white tiles with black accents (not the other way around)
- Run tiles vertically to create height
- Choose larger tiles to minimize grout lines (fewer lines = less visual chop = bigger feeling space)
- Create a focal point with a black accent wall to add depth
- Use the same floor tile into the shower to eliminate visual barriers
I made every mistake possible in my first small bathroom renovation. I used tiny mosaic tiles (made it busy), went 50/50 on black and white (too much contrast in too little space), and chose a dark grout (emphasized every grout line). The result? My bathroom felt like it was closing in on me.
The Fix for Small Spaces
When I got a chance to redo it, I went with large white tiles on the walls (12×24 inches laid vertically), white floor tiles with a simple black border, and one black accent stripe at eye level running around the perimeter. The difference was like night and day—suddenly the bathroom felt twice as big.
The trick is using black as punctuation, not as a paragraph. A little goes a long way in tight spaces.
Marble Accent Black and White Bathroom
Want to feel fancy? Real talk—nothing says luxury quite like marble. But here’s the thing: you don’t need to marble-ify your entire bathroom to get that high-end look. Strategic marble accents mixed with standard black and white tiles give you the bougie vibe without the terrifying price tag.
I splurged on marble for my shower floor and a feature wall, then used affordable porcelain tiles that mimicked marble for the rest of the space. Unless you’re examining closely (and seriously, who does that?), it all reads as cohesive and expensive.
Where to use real marble for maximum impact:
- Shower bench or niche
- Vanity countertop
- One feature wall or backsplash
- Floor border or inlay
- Windowsill or shelf
Where to use marble-look porcelain:
- Main shower walls
- Floor tiles
- Larger wall areas
The beauty of this approach is that you get the aesthetic impact of a fully marbled bathroom without the maintenance headaches or the second mortgage. Real marble requires sealing and careful maintenance, while porcelain just needs regular cleaning. Win-win.
Mixing Marble Styles
Black marble, white marble, or that gorgeous veined Carrara marble? Why not mix them? I created a stunning vanity area using white Carrara marble on the countertop and black marble-look tiles on the floor. The veining in both created movement and interest without being matchy-matchy.
Also Read: 15 Inspiring Black Tile Bathroom Looks to Try Now
Scandinavian Black and White Serenity
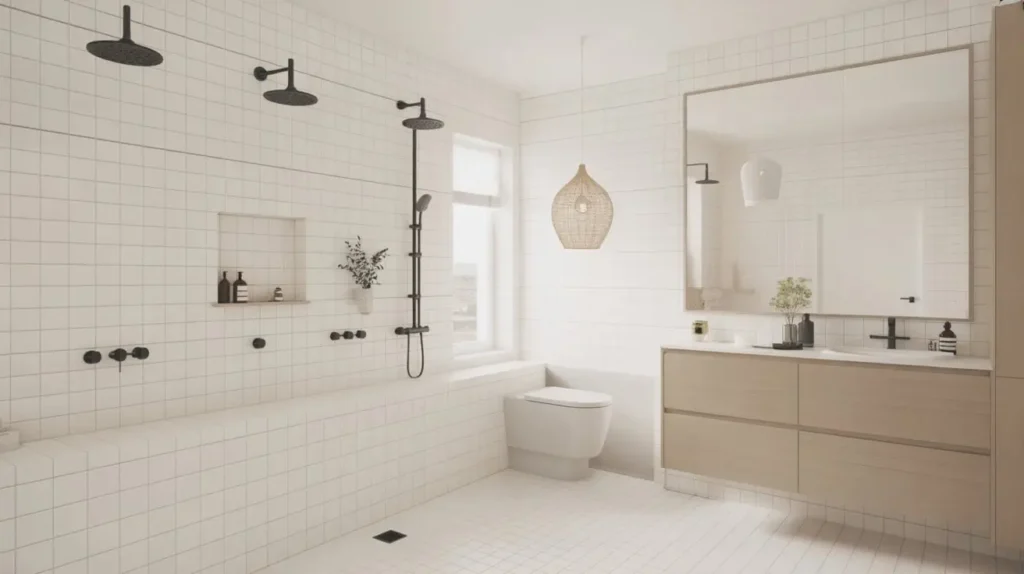
Scandinavian design is all about that hygge life—cozy, functional, and beautiful in its simplicity. When you apply Scandi principles to a black and white bathroom, you get a space that feels serene, uncluttered, and surprisingly warm despite the minimalist palette.
I’m a huge fan of Scandinavian design (my living room is basically an IKEA showroom at this point), and bringing that aesthetic into the bathroom just makes sense. You’re combining the clean lines of minimalism with warm natural materials and plenty of white to maximize light—crucial for those dark Nordic winters (or just, you know, Monday mornings).
Scandinavian bathroom essentials:
- Predominantly white with minimal black accents
- Natural wood elements (vanity, shelving, or accessories)
- Simple, functional fixtures in matte black or brushed nickel
- Plenty of natural light or excellent artificial lighting
- Clean lines and clutter-free surfaces
- Textured textiles (white or gray towels, woven baskets)
The Scandi approach to black and white is gentle. You’re using black sparingly—maybe in your fixtures, a thin tile border, or bathroom accessories. The goal is calm and peaceful, not dramatic and bold.
Functionality Meets Beauty
What I appreciate most about Scandinavian design is that it’s deeply functional. Every element serves a purpose. That beautiful wooden stool? It’s also where you sit to shave your legs. That woven basket? It stores your towels. That wall-mounted shelf? It holds your daily essentials within easy reach.
When I redesigned my bathroom with Scandi principles, I became ruthless about what stayed and what went. No decorative nonsense that just collects dust. Everything earned its place by being either useful or genuinely beautiful (or ideally, both).
High-Gloss Modern Tile Bathroom
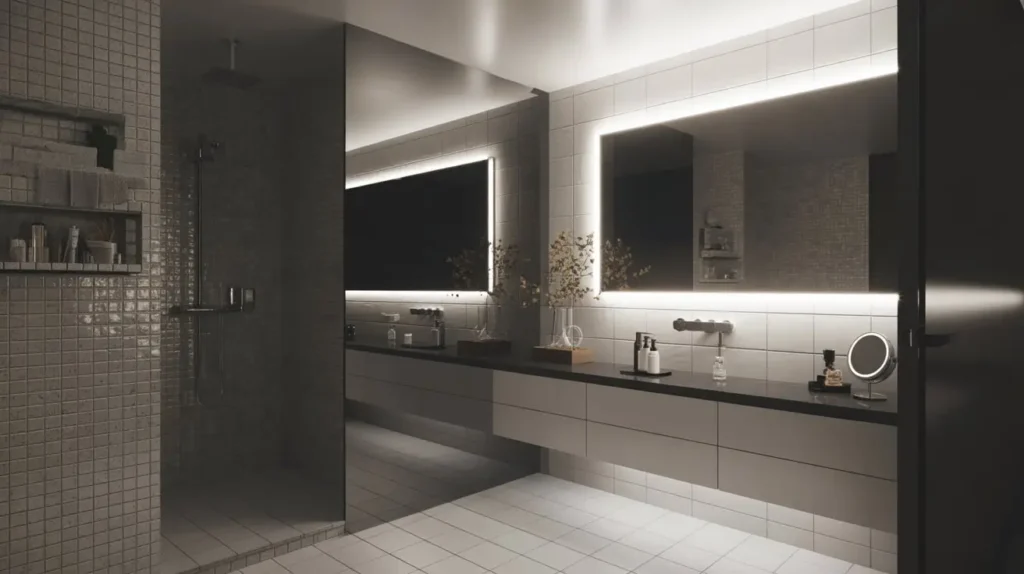
Alright, let’s talk about turning your bathroom into a mirror hall—in a good way. High-gloss black and white tiles create this ultra-modern, reflective surface that amplifies light and makes everything feel more spacious. It’s dramatic, it’s contemporary, and it definitely makes a statement.
Fair warning though: high-gloss tiles show every water spot, smudge, and fingerprint. My friend installed glossy black tiles in her shower and now spends half her life squeegeeing. But does it look amazing? Absolutely. Is it worth the extra maintenance? That’s between you and your squeegee 🙂
Benefits of high-gloss tiles:
- Reflects light beautifully, making spaces feel larger and brighter
- Creates a sleek, modern aesthetic
- Easy to clean (ironically, even though you have to do it more often)
- Adds depth and dimension to the space
- Makes colors appear more vibrant and saturated
The reality check:
- Shows water spots and streaks easily
- Can be slippery when wet (crucial consideration for floors)
- May create glare in poorly planned lighting situations
- Requires frequent cleaning to maintain that pristine look
I used high-gloss white tiles on my bathroom walls with matte black floor tiles, and it’s the perfect compromise. I get that light-bouncing, space-expanding effect on the walls, but my floors don’t turn into ice rinks when they get wet.
Mixing Gloss and Matte
Here’s a pro tip: don’t go full gloss everywhere. Mix glossy and matte finishes to create contrast and avoid the “I can’t stop staring at my reflection” effect that happens when everything is shiny. Glossy white walls with matte black fixtures? Perfection. Glossy black accent wall with matte white floor? Also gorgeous.
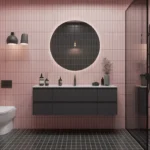
Pattern Play: Geometric Tile Bathroom
Let’s get wild with patterns, shall we? Geometric tiles are having a major moment right now, and for good reason—they add personality, visual interest, and that “I hired a designer” look to your bathroom without requiring an actual designer.
Geometric patterns in black and white run the gamut from subtle to “whoa, did you drop acid before designing this?” I personally fall somewhere in the middle—I want interesting patterns that catch the eye without inducing seizures.
Popular geometric patterns to consider:
- Hexagons (from tiny penny-sized to large 8-inch tiles)
- Moroccan-inspired patterns (fish scales, arabesques)
- Triangles and chevrons
- Encaustic cement tile designs
- 3D optical illusions (cubes, stepped patterns)
- Mixed geometric medleys
I went absolutely bonkers with geometric patterns in my powder room because, let’s face it, powder rooms are the perfect place to take risks. Nobody’s spending extended time in there, so you can go bold. I chose these incredible black and white hexagonal tiles with a flower pattern inside each hexagon, and it’s become a conversation starter at every party.
Balancing Pattern with Simplicity
The rule of thumb with busy geometric patterns is this: use them strategically, not everywhere. A geometric floor with plain walls? Beautiful. Geometric walls with a plain floor? Also works. Geometric floor AND geometric walls in different patterns? You’ve created a fun house, and not in a good way.
When working with bold patterns, I keep everything else super simple. White fixtures, minimal accessories, clean lines. Let the tile pattern be the statement piece.
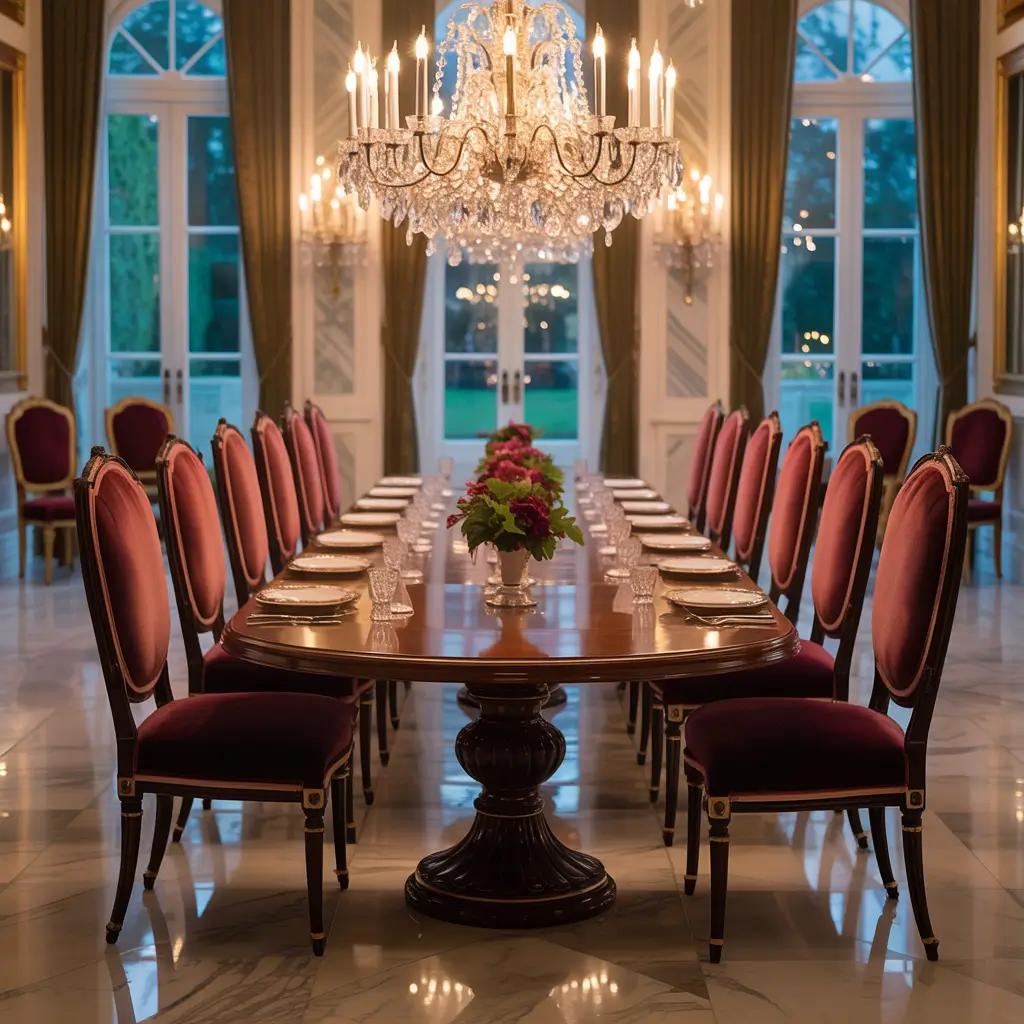
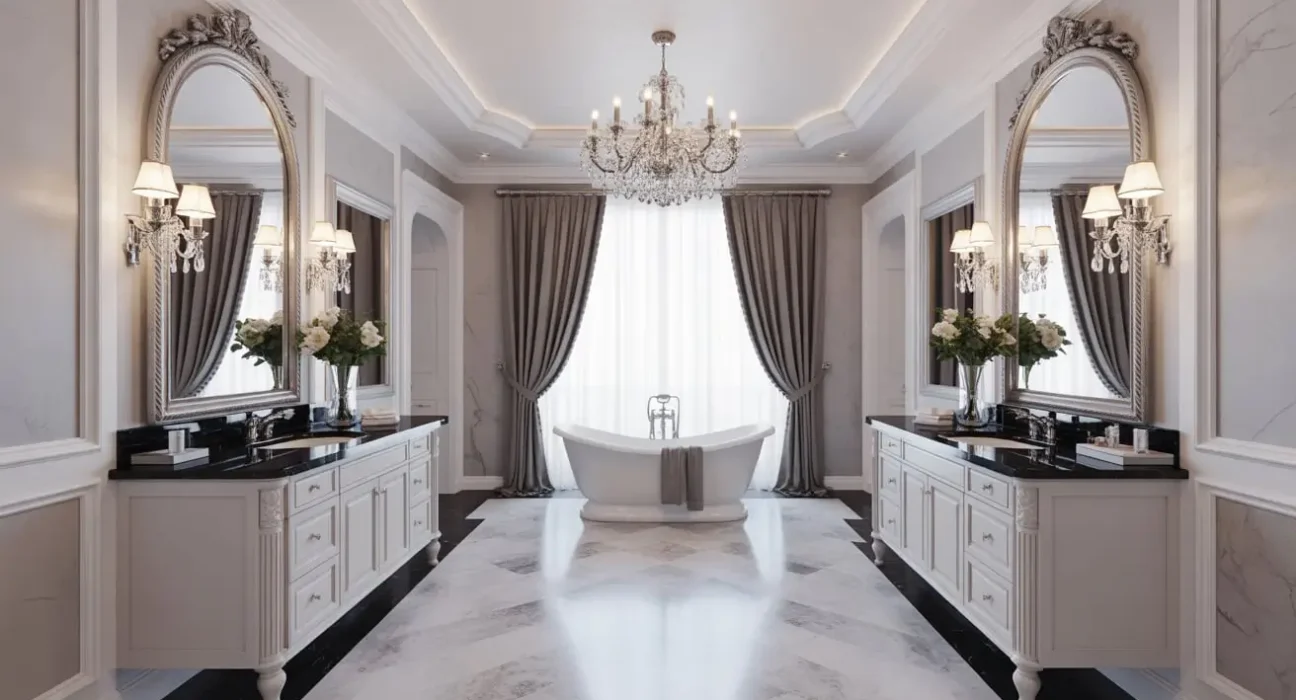
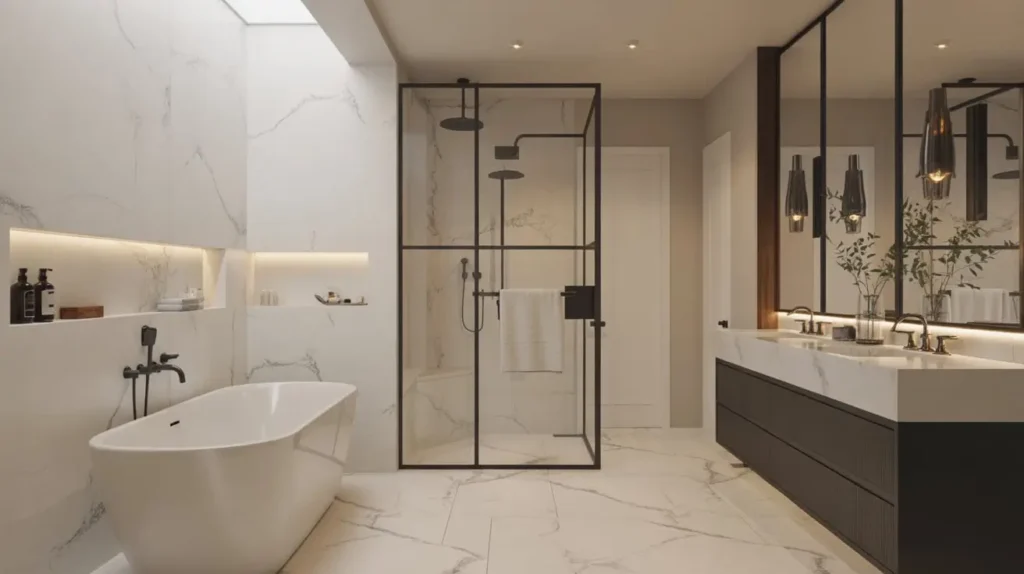
Timeless Black and White Luxury Space
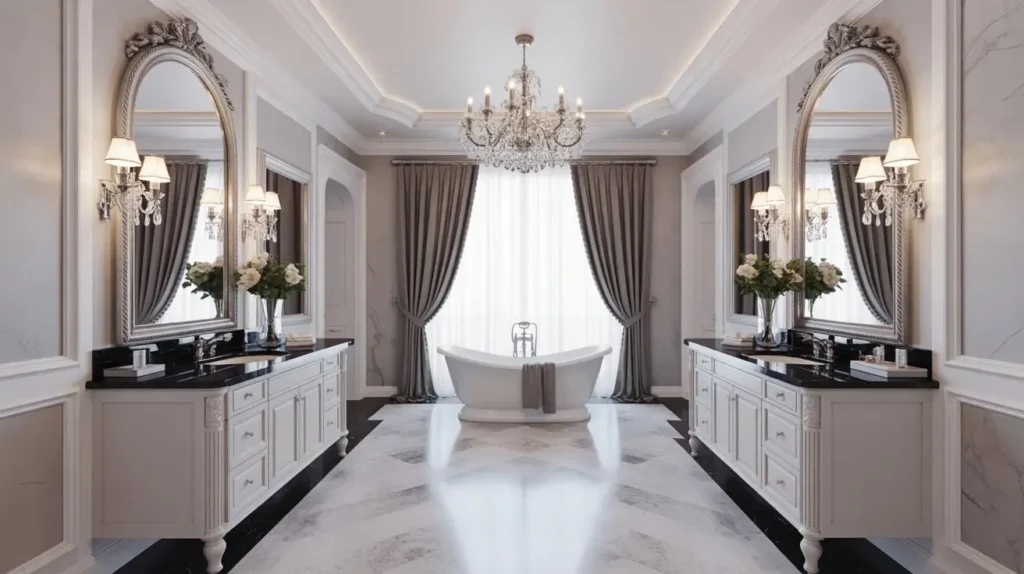
Sometimes you don’t want trendy—you want timeless. You want a bathroom that’ll look just as good in 20 years as it does today. That’s where classic luxury comes in, and black and white is the perfect palette for creating enduring elegance.
Luxury black and white bathrooms combine high-quality materials, classic design principles, and attention to detail. We’re talking marble, high-end fixtures, maybe some crystal or brass accents, and an overall sense of “yes, I have my life together, thank you for noticing.”
Elements of timeless luxury:
- Natural stone tiles (marble, granite, or high-quality porcelain alternatives)
- Classic tile patterns (subway, herringbone, basket weave)
- Quality fixtures in timeless finishes (polished chrome, brushed nickel, or unlacquered brass)
- Generous proportions and thoughtful layout
- Crown molding or decorative trim work
- Statement lighting (chandelier, sconces, or modern pendants)
- Freestanding tub or walk-in shower with frameless glass
I visited a friend’s newly renovated bathroom that nailed this aesthetic, and I literally stood there taking notes. She used white Carrara marble throughout, added black marble accents in the shower niche, installed a clawfoot tub painted in glossy black, and topped it off with a vintage-style chandelier. It felt like a boutique hotel bathroom, but somehow still cozy and personal.
Investing in Quality
Here’s the thing about creating a timeless luxury bathroom—you need to invest in quality. That doesn’t necessarily mean spending a fortune on every element, but it does mean being selective about where you splurge.
I recommend putting your money into fixtures and natural stone accents that’ll last decades, then saving on elements you can easily replace later (shower curtains, accessories, textiles). That gorgeous marble vanity top? Worth the investment. Those trendy black towels? Get the affordable ones.
Industrial Chic Black and White Bathroom
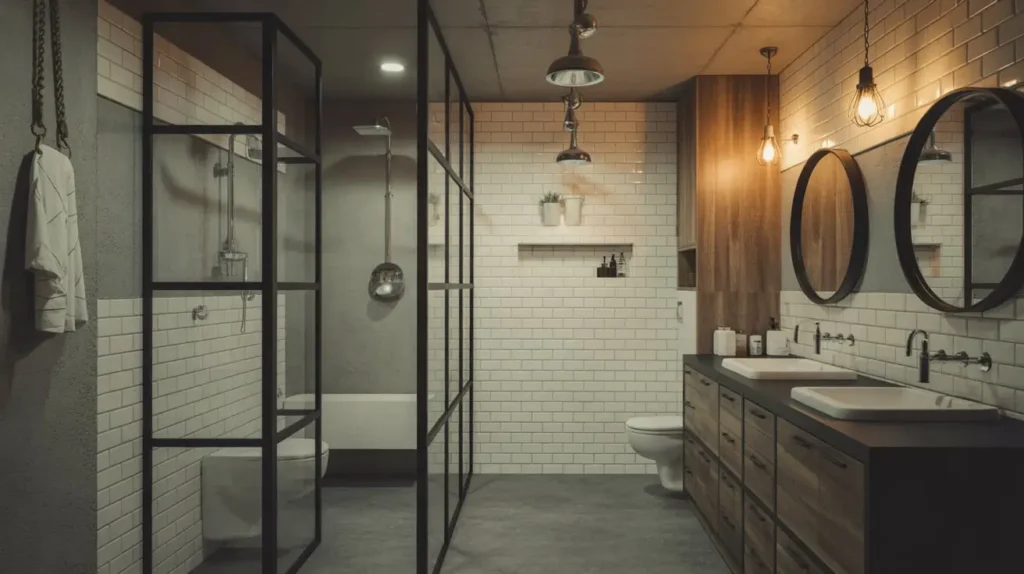
Exposed brick, concrete vibes, metal accents—industrial design brings that urban loft aesthetic into your bathroom. And honestly? It’s pretty cool when done right. You’re mixing raw, utilitarian elements with polished black and white tiles to create something that feels both edgy and refined.
I’m a sucker for industrial design (must be all those loft conversion shows I’ve binged), and bathrooms are a surprisingly great place to embrace this style. The inherent functionality of bathrooms aligns perfectly with industrial design’s form-follows-function philosophy.
Industrial bathroom elements:
- Matte black fixtures and hardware
- Exposed pipes or pipe-style fixtures
- Concrete or concrete-look tiles
- White subway tiles (preferably with dark grout)
- Metal-framed mirrors and glass shower enclosures
- Edison bulb lighting or cage-style fixtures
- Minimal ornamentation
The key to industrial chic is embracing imperfection and rawness. You’re not trying to hide the utilitarian aspects of a bathroom—you’re highlighting them. That exposed shower pipe? It’s a feature, not a bug. Those visible mounting brackets? Part of the aesthetic.
Softening the Edge
Pure industrial can feel a bit cold and harsh, which is why I like to soften it with warm wood accents or textured textiles. A reclaimed wood vanity against white subway tiles and concrete floors? Now you’ve got industrial warmth. Throw in some greenery (plants thrive in bathrooms!), and you’ve balanced the hard edges with organic softness.
Budget-Friendly Black and White Tile Upgrade

Let’s talk money. Because yes, we all want those gorgeous black and white bathroom transformations we see on Pinterest, but not all of us have renovation budgets that could fund a small car purchase.
Good news: you absolutely can achieve a stunning black and white bathroom transformation without selling a kidney. I’ve done budget bathroom makeovers for under $2,000 that look like they cost five times that much. The secret? Smart choices and strategic DIY.
Budget-friendly strategies that work:
- Use affordable ceramic tiles instead of natural stone (the quality has gotten amazing)
- DIY the demo and simple parts of the installation
- Focus your tile work on high-impact areas (feature walls, shower surrounds)
- Mix expensive statement tiles with affordable filler tiles
- Shop for fixtures at home improvement stores during sales
- Use peel-and-stick tiles for temporary solutions or rental-friendly updates
- Paint existing tiles (yes, really—with proper prep and paint, it can work)
I renovated my rental bathroom for under $1,500 by getting creative. I couldn’t replace the pink bathtub (landlord rules), so I worked with it—white subway tiles on the walls, black and white geometric floor tiles, black fixtures, and a black shower curtain. That pink tub suddenly looked like an intentional vintage touch instead of a dated eyesore.
Where to Save and Where to Splurge
Even on a tight budget, some elements deserve your investment:
Splurge on:
- Quality underlayment and waterproofing (water damage is expensive)
- Decent grout and sealant
- The toilet (you use it daily—get one that works well)
Save on:
- Wall tiles (unless they’re the focal point)
- Accessories and decor
- Towels and textiles
- Paint and basic hardware
The beauty of black and white tiles is that even affordable options look expensive because the classic color combo automatically reads as intentional and designed. A $2 per square foot black and white tile in the right pattern can look just as good as a $15 tile in the wrong application.
Pulling It All Together
Here’s what I’ve learned through multiple bathroom renovations and way too many hours scrolling through design inspiration: black and white tile bathrooms work because they’re fundamentally versatile. Whether you’re going vintage or modern, bold or subtle, luxurious or budget-friendly, this classic color combination adapts to your vision.
The transformations I’ve walked you through aren’t just about aesthetics (though let’s be honest, that’s a huge part of it). They’re about creating a space that makes you feel good every single day. Your bathroom should be more than just functional—it should be a space you actually enjoy being in, whether you’re getting ready for work or unwinding with a bath after a long day.
So where do you start? Pick the style that speaks to you, assess your budget honestly, and take it one step at a time. You don’t need to gut your entire bathroom in one weekend (please don’t try—I’ve been there, and it’s a disaster). Start small with a feature wall or new floor tiles, see how you feel, and build from there.
And remember, there’s no “wrong” choice here. Your bathroom is yours to design, and if you want to mix Scandinavian serenity with industrial edge and a touch of Art Deco glamour, who’s going to stop you? Design rules are more like guidelines anyway, and the best spaces come from breaking them in interesting ways.
Now if you’ll excuse me, I need to go admire my checkerboard floor while pretending I’m not already planning my next bathroom renovation. It’s a sickness, really, but at least I’ll have gorgeous bathrooms to show for it