

15 Gorgeous Wall Decor Living Room Ideas on a Budget
You know that awkward feeling when you walk into your living room and something just feels… off? Yeah, I’m talking about those blank walls staring back at you like they’re judging your life choices. Trust me, I’ve been there—sitting on my couch, sipping coffee, staring at boring beige walls and wondering why my space looked like a sad dentist’s waiting room.
Here’s the thing: transforming your living room doesn’t require selling a kidney or maxing out your credit cards. I’ve spent the last few years experimenting with wall decor (and making plenty of mistakes, oops), and I’m here to share what actually works without breaking the bank. Let’s talk about 15 gorgeous wall decor ideas that’ll make your living room look like you hired an interior designer—when really, you just got smart about where to spend your money.
Gallery Wall with Mixed Frames
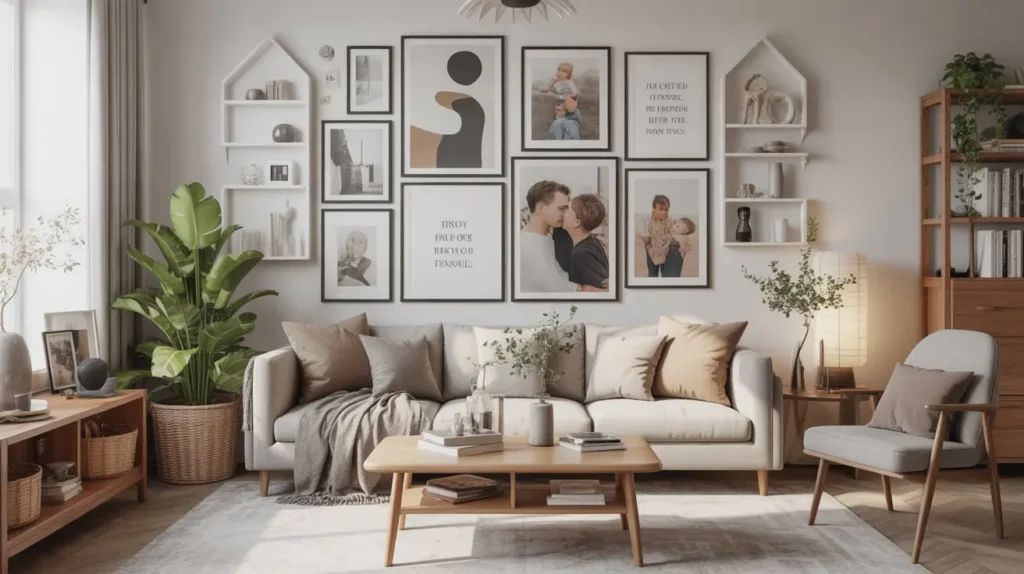
Okay, can we just acknowledge that gallery walls are having a serious moment right now? And for good reason—they’re ridiculously versatile and budget-friendly.
I started my first gallery wall with frames I grabbed from thrift stores, garage sales, and yes, even that dusty box in my parents’ attic. The secret sauce here is mixing different frame sizes, colors, and styles to create visual interest. You don’t need matching frames from some expensive boutique. Actually, the mismatched look adds character that perfectly uniform galleries just can’t replicate.
Here’s what I learned the hard way:
- Start with a layout plan on the floor before hammering anything into your wall (saved me so many unnecessary holes)
- Mix photo sizes from 4×6 to 11×14 for dynamic visual flow
- Include 3-5 different frame finishes—think gold, black, white, and natural wood
- Fill frames with free printables, personal photos, or pages from old books
Pro tip? Use painter’s tape to map out your arrangement on the wall first. Your walls (and security deposit) will thank you later.
The best part about gallery walls is you can build them gradually. Start with 5-7 frames and add more as you find pieces you love. I’m still adding to mine three years later, and honestly, that’s half the fun.
Oversized Statement Art Piece
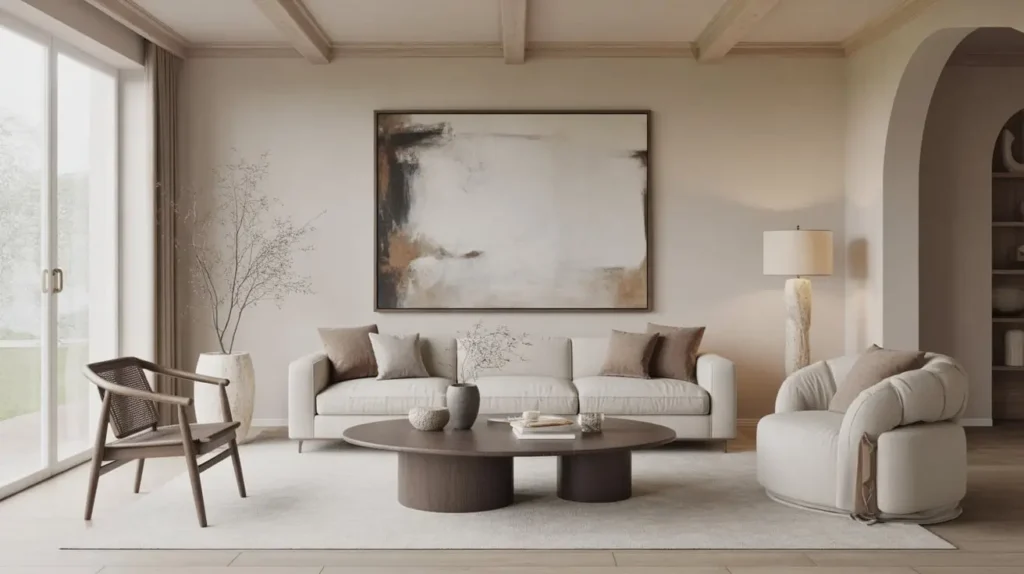
Want maximum impact with minimal effort? One large statement piece does the heavy lifting for you.
I’ll be real with you—I used to think big art meant big bucks. Then I discovered the magic of printable digital art and nearly affordable canvas prints online. You can snag stunning oversized prints for under $30 if you know where to look. Sites like Etsy, Society6, and even Amazon offer massive selection without the gallery price tags.
What size should you go for? Aim for something that takes up at least two-thirds of your furniture’s width. So if your couch is 90 inches wide, think 60 inches minimum for your art. This creates balance and prevents that floating-in-space look that screams amateur hour.
Some budget-friendly options I’ve tried:
- Large canvas prints from online discount retailers ($25-50)
- DIY stretched canvas with fabric or tapestries ($15-30)
- Oversized framed poster prints ($20-40)
- Engineering prints blown up at office supply stores (seriously cheap!)
The engineering print hack changed my life, FYI. You can get a 24×36 print for like $3 at most office supply stores. Frame it, and suddenly you’re looking at high-end vibes for less than your morning latte habit.
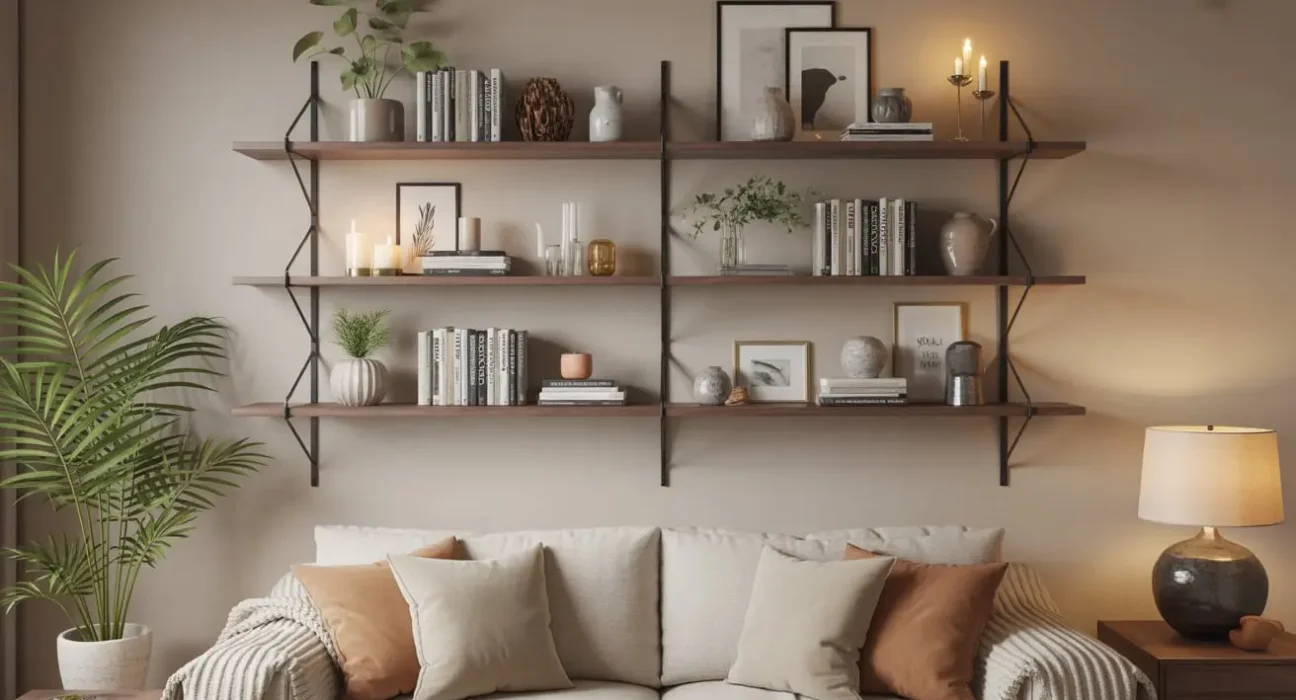
Floating Shelves with Styled Decor
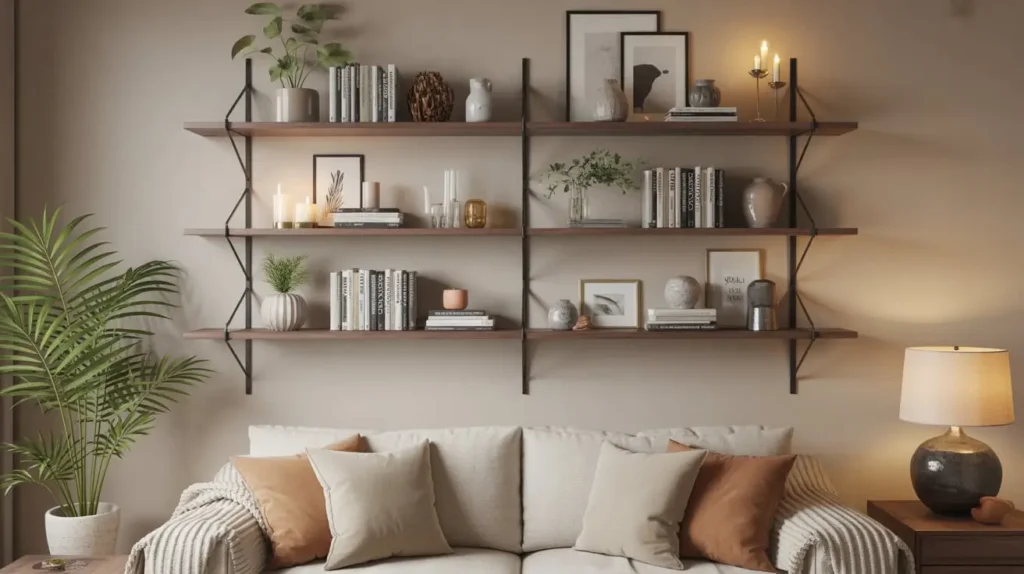
Floating shelves are sneaky brilliant because they pull double duty—storage AND decoration. Who doesn’t love multitasking?
I installed my first set of floating shelves thinking they’d just hold books. Wrong. They became my favorite design element in the entire room. You can constantly refresh what’s on them without any commitment, which feeds my indecisive personality perfectly.
Installation costs: About $15-30 per shelf if you go with basic wood shelves from home improvement stores. If you’re handy (or know someone who is), you can make them even cheaper with raw wood and some stain.
What should you actually put on these shelves? Here’s my formula:
- Books (stacked horizontally and vertically for variety)
- Small plants (fake ones count—no judgment here)
- Decorative objects in groups of three
- Picture frames leaning casually against the wall
- Candles or small vases
The trick is varying heights and textures. Don’t line everything up like little soldiers. Layer things, let some items lean, and leave some breathing room. Cluttered shelves just look messy, not curated.
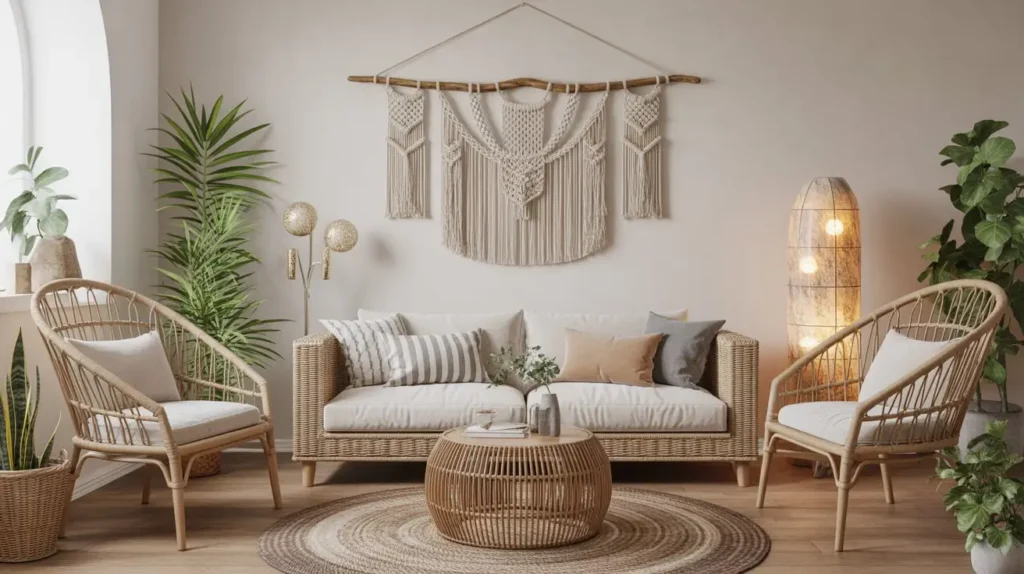
Boho Woven Wall Hangings
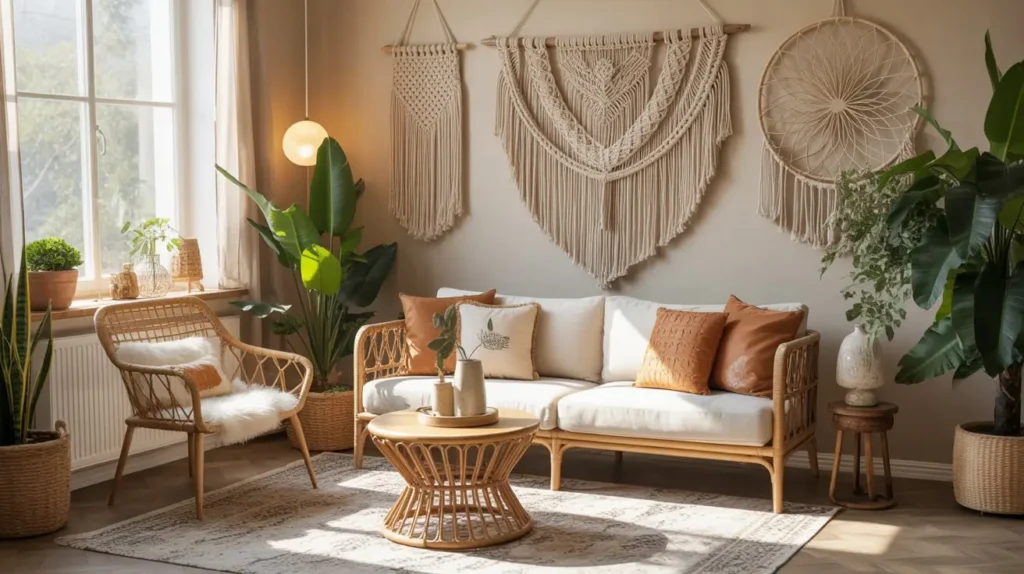
If you’re into that laid-back, earthy vibe, woven wall hangings are your new best friend.
I jumped on the boho bandwagon maybe a year ago (yeah, I was late to the party), and these textured beauties instantly warmed up my space. The best part? You can find gorgeous woven pieces at places like HomeGoods, Target, and TJ Maxx for $20-50. Or, if you’re feeling adventurous, DIY versions cost even less.
Why woven wall hangings work so well:
- They add texture and dimension to flat walls
- The neutral tones blend with virtually any color scheme
- They soften hard edges and industrial elements
- Seriously budget-friendly compared to traditional art
Look for pieces in natural fibers like cotton, jute, or wool. The handmade, slightly imperfect look adds authenticity. I’ve got one above my couch that I scored for $25, and everyone who visits asks where I got it. Success 🙂
Want to go the DIY route? Macramé kits run about $15-25 and come with everything you need. Plus, you can brag about making it yourself, which is always a nice flex.
Minimalist Black-and-White Prints
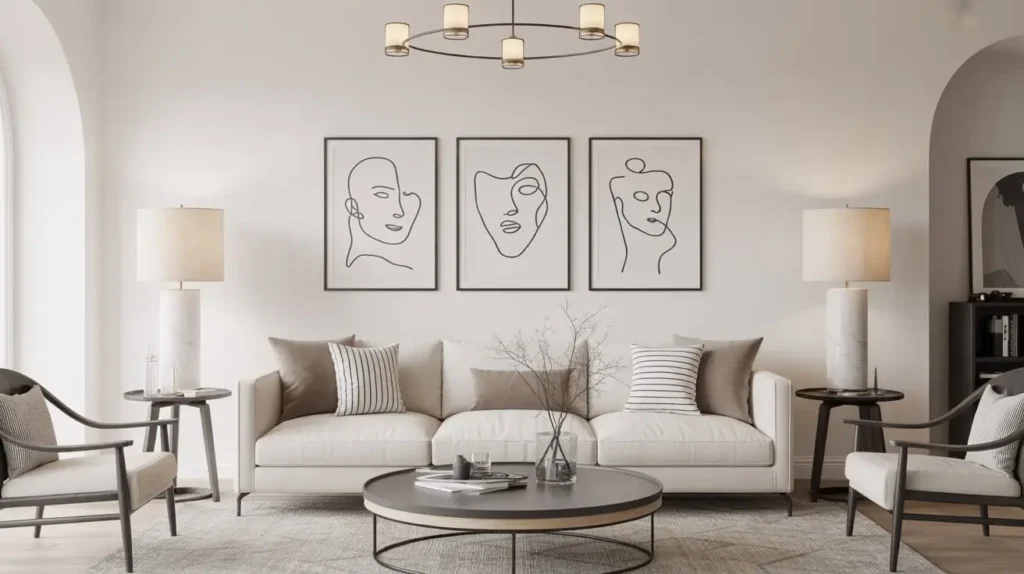
Sometimes simplicity hits different, you know?
Black-and-white prints are the little black dress of wall decor—timeless, elegant, and they work with literally everything. I love them because they create sophisticated impact without overwhelming your space or clashing with your ever-changing throw pillow obsession (guilty as charged).
Where to find affordable black-and-white prints:
- Free printable art websites (yes, completely free!)
- Etsy digital downloads ($3-10)
- Frame pages from old photography books
- Your own photos printed at Walgreens or CVS
The frame matters more than you’d think here. A cheap print in a quality frame looks expensive. A expensive print in a cheap frame looks… cheap. I learned this the expensive way, so learn from my mistakes.
Try creating a series of three or five matching-sized prints in identical frames. This creates a cohesive, gallery-like feel that screams “I know what I’m doing” even if you’re completely winging it. Grid layouts work particularly well with black-and-white prints because the uniformity feels intentional and polished.
Also Read: 15 Cozy Living and Dining Room Combo Ideas with Warm Vibes
Large Round Accent Mirror
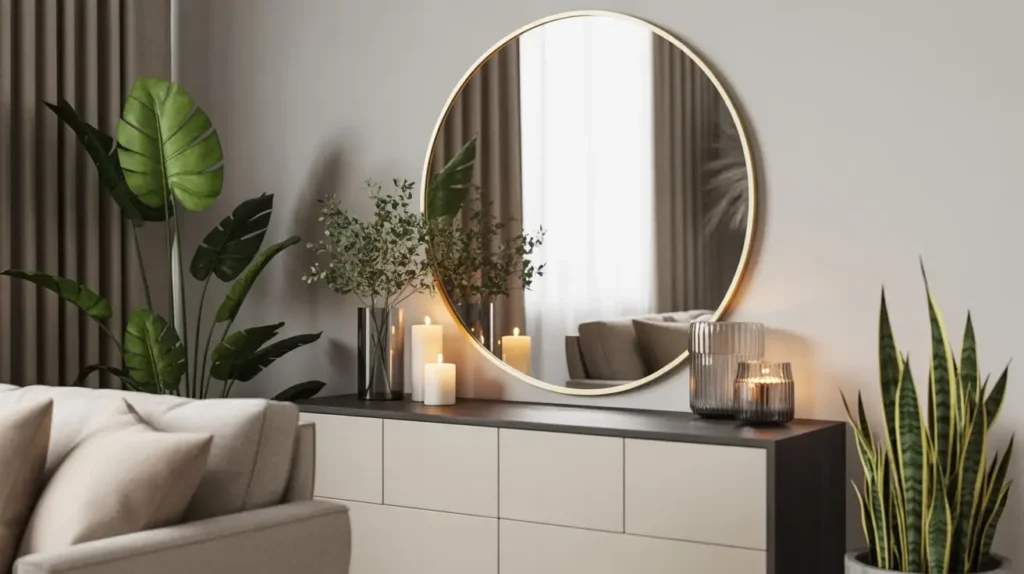
Let’s talk about mirrors for a second. They’re basically wall decor cheat codes.
A large round mirror doesn’t just look good—it makes your room feel bigger and brighter by reflecting light around the space. I put one opposite my window, and suddenly my dark living room felt like it had twice the natural light. Magic? Basically.
Round mirrors have this softening effect that balances all the rectangular furniture and sharp angles in most living rooms. The circular shape draws the eye and creates a focal point without being aggressive about it.
Budget-friendly mirror hunting tips:
- Check HomeGoods and TJ Maxx regularly (selection rotates weekly)
- Facebook Marketplace and Craigslist have surprisingly good options
- IKEA’s mirror selection punches above its price point
- Thrift store mirrors + spray paint = designer dupe
I found mine at a thrift store for $12. It had this outdated gold frame, so I spray painted it matte black, and now it looks like something from West Elm. Total cost? $18 including the spray paint. Not too shabby, right?
Size matters here too. Go as large as you can afford and fit on your wall. A tiny mirror just looks like you couldn’t commit. If you’re hanging it above a console or couch, aim for 30-36 inches in diameter minimum.
Nature-Inspired Botanical Wall Art
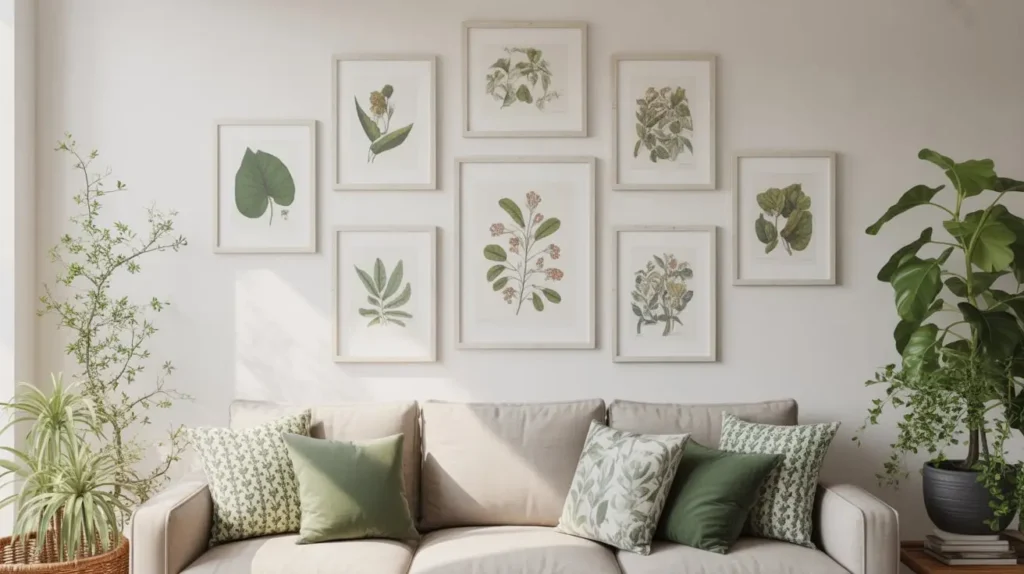
Bringing the outside in never goes out of style, and botanical prints are having a major renaissance right now.
I’ve always felt like plants make spaces feel alive (even when they’re just pictures of plants). Botanical wall art works whether your style is modern farmhouse, traditional, eclectic, or somewhere in between. It’s that versatile.
My favorite budget sources for botanical art:
- Pressed flowers in simple frames (literally free if you press them yourself)
- Vintage botanical illustration prints from library sales
- Digital downloads of vintage botanical drawings
- Frame beautiful pages from old gardening catalogs or books
Here’s a cool idea I tried last spring: I bought a vintage botanical encyclopedia at a used book sale for $3, carefully removed my favorite illustrations, and framed them in matching white frames from the dollar store. Total cost for six framed botanical prints? About $15. They look like I spent hundreds, and I get compliments on them constantly.
The green tones in botanical art are naturally calming and bring life to your space without the commitment of keeping actual plants alive. (Because let’s be honest, some of us weren’t blessed with green thumbs.)
Rustic Wooden Panel Wall Decor
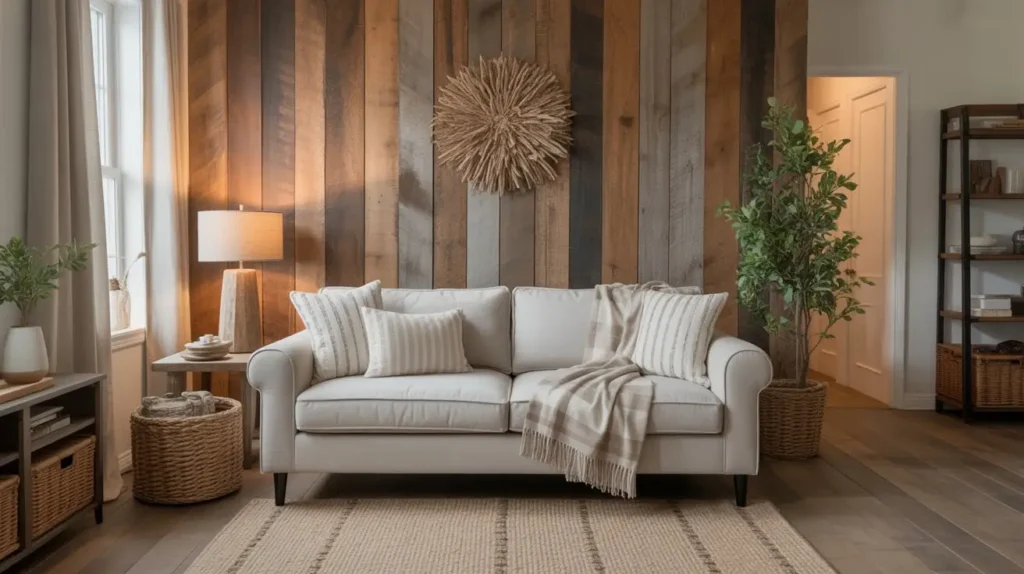
Rustic wood accents add warmth and texture that you just can’t get from paper prints or canvas art.
I was skeptical about wooden wall decor at first—seemed like it might look too country or farmhouse-y for my taste. But when I found reclaimed wood panels at a flea market and mounted them behind my TV, something clicked. The natural wood grain and weathered texture created this amazing contrast against my smooth white walls.
Budget-friendly wooden panel options:
- Reclaimed wood from salvage yards or Habitat for Humanity ReStores
- Pallet wood projects (free pallets from behind stores—ask permission!)
- Wooden wall art from HomeGoods or Target ($30-60)
- DIY projects using fence pickets and wood stain
IMO, the imperfections in rustic wood are what make it special. Knots, cracks, and weathering tell a story. Don’t stress about making everything perfect—that defeats the whole rustic aesthetic.
One warning though: real wood can be heavy. Make sure you’re using appropriate wall anchors and hanging hardware. I nearly learned this the hard way when my first wooden panel installation started pulling away from the wall. Not cute.
Modern Metal Wall Sculptures
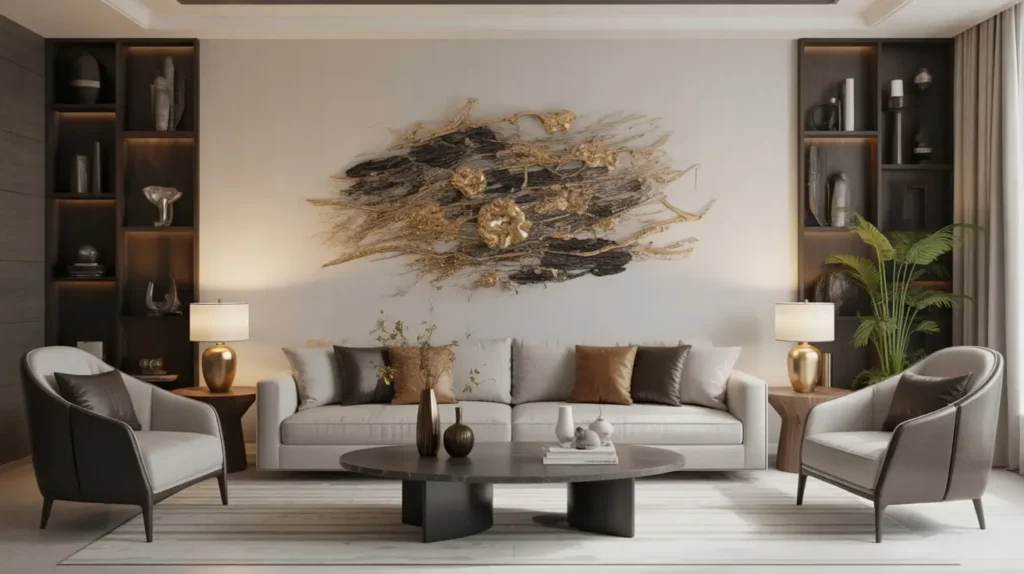
Metal wall art brings a contemporary edge that photographs and prints just can’t match.
The three-dimensional aspect of metal sculptures catches light differently throughout the day, which means your wall decor literally changes as the day goes on. Pretty cool, right? I’ve got a geometric metal piece that looks completely different in morning light versus evening—it’s like getting two pieces of art for the price of one.
You can find modern metal wall sculptures at surprisingly reasonable prices if you know where to look:
- Target and Walmart ($25-60 for smaller pieces)
- Online retailers like Wayfair during sales
- Local artisan markets (negotiate on the last day!)
- DIY with wire and basic tools (YouTube is your friend here)
The key is choosing a piece that complements your existing style without overwhelming the space. I recommend starting with something in a neutral metallic finish—black, bronze, or brushed gold work with most color schemes.
Metal art works particularly well in modern, industrial, or contemporary spaces. If your vibe is more traditional or shabby chic, you might want to skip this one or choose something with softer, more organic shapes.
Textured 3D Wall Art Installations
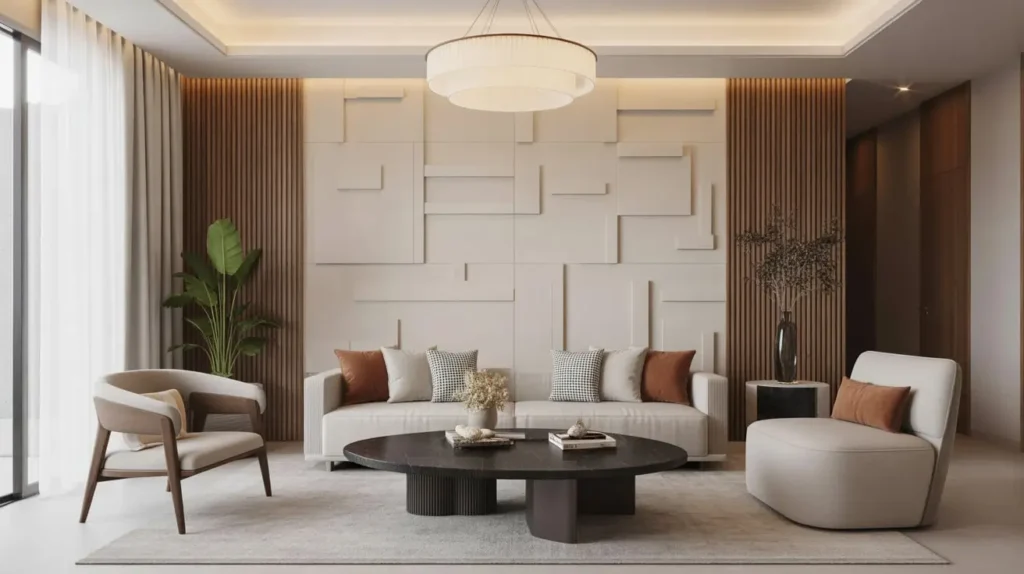
Flat is fine, but have you tried adding actual dimension to your walls?
3D wall art creates shadows and depth that make your walls way more interesting. I’m talking about anything from layered wood designs to plaster reliefs to sculptural paper installations. The texture catches light and creates visual intrigue that you just don’t get from standard prints.
Budget-friendly 3D wall art ideas:
- Paper flower or origami installations (materials cost under $20)
- Foam board geometric designs painted to match your decor
- Layered canvas or wood circles in various sizes
- Textured plaster art (DIY with basic supplies)
I made my own 3D hexagon wall installation using foam board, wood dowels, and metallic spray paint for about $25 total. It took a Saturday afternoon, but now I have a completely custom piece that nobody else has. Plus, I can casually mention “I made it” when people ask. 🙂
The installation process can be a bit finicky—you’ll want a level and probably a friend to help you position everything properly. But the end result is totally worth the effort.
Framed Fabric or Textile Art

Who says art has to be painted or printed? Fabric and textiles create stunning wall decor with unique texture and pattern.
I stumbled onto this idea when I bought an absolutely gorgeous scarf at a vintage shop but never actually wore it. Instead of letting it collect dust in my closet, I stretched it over a canvas frame and hung it on my wall. Instant conversation piece for like $8 total.
Textile options that make great wall art:
- Vintage scarves from thrift stores
- Fabric remnants from craft stores
- Tapestries or throw blankets with interesting patterns
- Embroidered pieces from flea markets
- Quilted squares from grandma’s sewing room
The beauty of fabric art is the texture and dimension it adds. The material creates subtle shadows and movement that flat prints can’t replicate. Plus, you’re literally hanging something unique—no one else has the exact same vintage textile you found.
Framing fabric is super straightforward. You can either stretch it over a canvas (use a staple gun and YouTube tutorial), or frame it behind glass like a traditional print. I prefer the stretched canvas method because it maintains the textile quality and lets the fabric breathe visually.
Also Read: 15 Elegant Small Living and Dining Room Combo Ideas for Homes
Accent Wall with Geometric Patterns
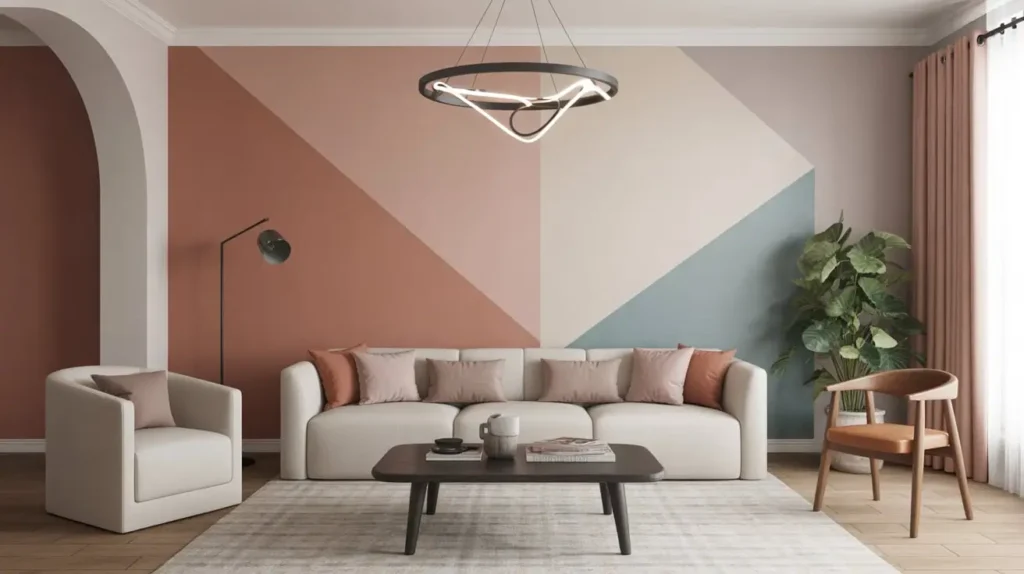
Sometimes your wall IS the art, and geometric accent walls absolutely crush it in the impact department.
Before you panic about your painting skills, let me reassure you: geometric patterns are way easier than they look. Armed with painter’s tape, a level, and some paint, you can create stunning patterns that look professionally designed. I did a chevron accent wall in my living room, and people legitimately thought I hired someone. Nope, just me, three rolls of painter’s tape, and a questionable amount of patience.
Budget-friendly geometric accent wall ideas:
- Simple horizontal or vertical stripes
- Chevron or herringbone patterns
- Hexagons or honeycomb designs
- Triangle patterns in complementary colors
- Color block designs with clean lines
The paint costs are minimal—usually $30-50 for enough paint to cover one accent wall. Painter’s tape is your other main expense at about $10-15 for quality stuff (don’t cheap out here or you’ll get bleed-through and cry).
My best advice? Start with a simple pattern for your first attempt. Stripes or color blocking are very forgiving. Save the intricate hexagon designs for when you’ve got a project under your belt. Also, measure twice, tape once. Trust me on this one.
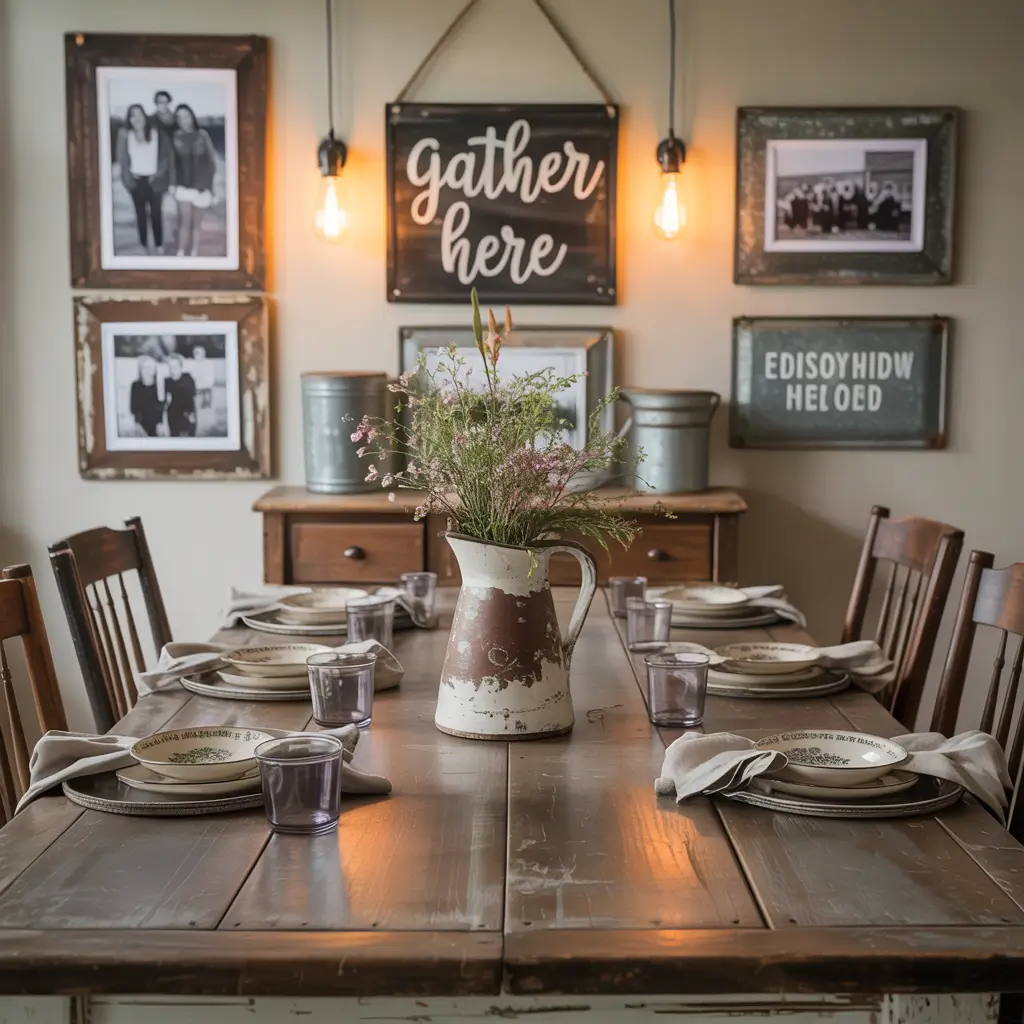
Vintage-Inspired Photo Collage
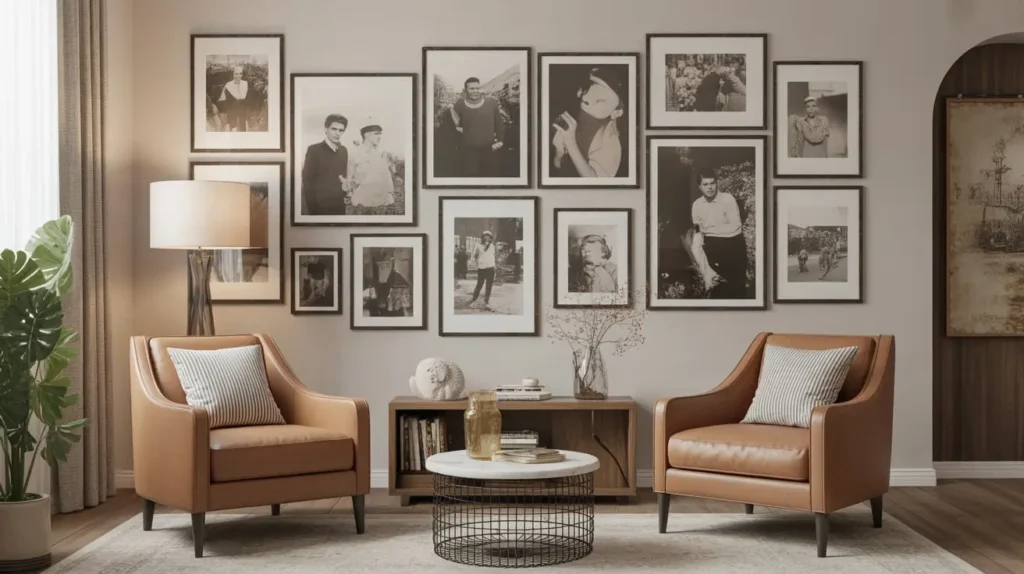
Nothing personalizes a space quite like photos, but we’re not talking about boring school picture lineups here.
A vintage-inspired photo collage mixes old and new photos with ephemera, postcards, and found objects to create a collected-over-time aesthetic. I love this approach because it tells a story and evolves with you. Plus, it’s basically free if you’re using photos you already have.
How to create a vintage-inspired photo collage on a budget:
- Mix black-and-white and color photos for visual variety
- Include vintage postcards from antique shops ($1 or less each)
- Add old maps, letters, or documents for texture
- Use mismatched vintage frames from thrift stores
- Incorporate small objects like old keys or medals
The “curated chaos” look is your goal here. This isn’t a rigid grid—it’s an organic collection that feels personal and authentic. I change mine out seasonally, swapping photos and adding new finds from my antique shop adventures.
Frame sizes should vary significantly, and don’t be afraid to lean some frames instead of hanging everything. The layered, casual approach feels more genuine than a perfectly planned arrangement.
Layered Canvas Art Arrangements
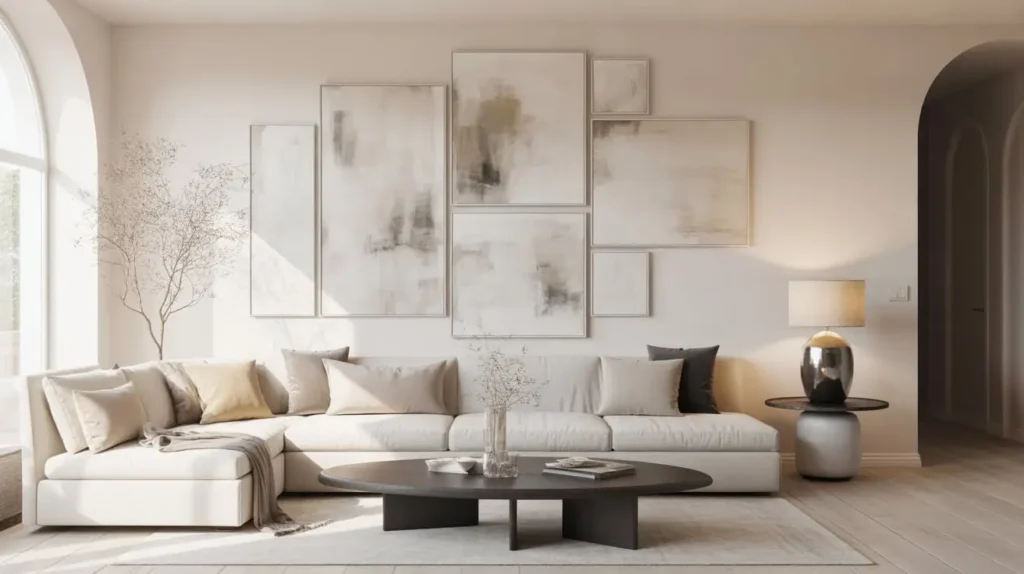
Here’s a trick that makes your wall decor look way more expensive than it actually is: layering.
Instead of hanging single pieces, overlap multiple canvases or frames at different depths. This creates dimension and makes even basic canvas prints look intentional and designed. I learned this from a design blog and immediately tried it with three cheap canvas prints from HomeGoods. Game changer.
How to create layered canvas arrangements:
- Choose 2-4 canvases in complementary sizes
- Vary the depth—some flush to the wall, some on shelf or ledge
- Overlap edges slightly for cohesive grouping
- Mix canvas depths (some thick, some thin) for variety
- Use command strips for easy repositioning
The beauty of this approach is flexibility. You can rearrange without new wall holes, which makes experimenting risk-free. I’ve probably repositioned my layered canvas setup six times in the last month, and I’m still not entirely sure where I want it permanently. The commitment-phobe’s dream, really.
Color coordination matters here. Choose pieces that share at least one or two colors to tie everything together visually. They don’t need to match perfectly—in fact, exact matches look too matchy-matchy—but they should feel like they belong in the same family.
DIY Macramé Wall Display
Last but definitely not least, let’s talk about macramé. Yes, it’s having a major comeback, and yes, you can absolutely make it yourself.
I won’t lie—I was intimidated by macramé at first. All those knots seemed complicated and time-consuming. But after watching a few YouTube tutorials and buying a $20 beginner kit, I realized it’s actually pretty straightforward. Repetitive? Sure. But complicated? Not really.
Why DIY macramé is perfect for budget decorating:
- Materials are incredibly affordable (cotton cord is cheap!)
- You create a completely custom piece
- It’s actually relaxing once you get into the rhythm
- The handmade aesthetic is trending hard right now
- One piece can fill significant wall space for under $30
You can find macramé kits on Amazon, Etsy, or craft stores that include everything you need: cord, dowel rod, and instructions. Or you can go rogue and just buy cotton cord and follow free tutorials online. I’ve done both, and honestly, the free tutorials work just as well as the paid kits.
The time investment is real—plan for 3-6 hours depending on size and complexity—but you can work on it while binge-watching your favorite shows. Productivity and entertainment combined? That’s what I call efficiency.
Making It All Work Together
Here’s the thing about wall decor: you don’t need to choose just one of these ideas. Mix and match based on your space, budget, and style preferences.
I’ve got a gallery wall in one section, floating shelves on another wall, and a large mirror opposite my window. They all work together because I stuck to a cohesive color palette and didn’t overcrowd my space. Less is often more, even when you’re trying to fill blank walls.
Start with one or two ideas that really speak to you, and build from there. Your living room doesn’t need to transform overnight. In fact, I think spaces that evolve gradually feel more authentic and lived-in than perfectly designed rooms that appear fully formed.
Final budget tips I wish someone had told me:
- Shop your own home first—you’d be surprised what you already own
- Thrift stores and estate sales are goldmines for frames and unique pieces
- Don’t underestimate the power of paint and spray paint transformations
- Digital downloads are your budget-friendly best friend
- Quality frames make cheap art look expensive (invest here if anywhere)
Remember, your living room should reflect YOU, not some Pinterest board or magazine spread. The best spaces have personality and tell a story. So grab that thrifted frame, download that free printable, or finally use that fabric you’ve been hoarding, and make your walls interesting again.